#edit: tdap
Explore tagged Tumblr posts
Visit Tumblr Blog
Explore Tumblr blogs with no restrictions, modern design and the best experience.
Last Seen Tumblr Blogs


Fun Fact
After the announcement of the deal with Yahoo!, there were 170K signatures of unhappy Tumblr users petitioning to prevent the sale in 2013.
Text
Last Lunesday of the Week
Listening: No organized listening today; was out and about so the jams did not begin playing at the appointed time.
Reading: Started reading Princess of Mandalore, which is a Tanya x Star Wars crossover that starts sometime after Episode I but before the Clone Wars really kicks off. Good plot; intermittent grammar, spotty character differentiation but I'm keeping on because the plot outweighs the grammar issues. Will Tanya get recruited by the Jedi, or the Duke of Serenno? Will she develop feelings for her new adjutant? Will she ever get to fight?
Writing: Started a flowchart of the Iliad with major plot points, using a children's illustrated edition.
Crafting:
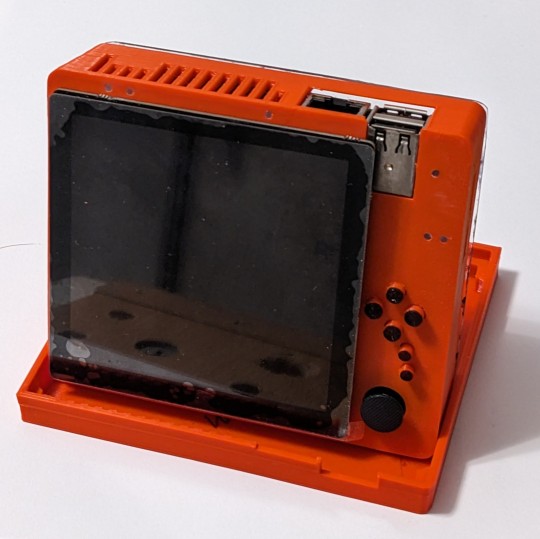
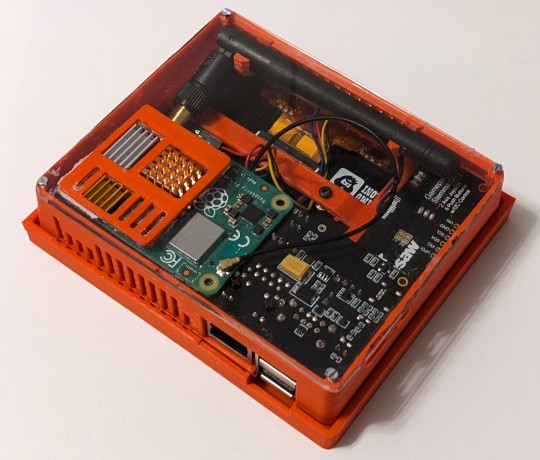
Have a more-or-less final version of the cyberdeck palmtop computer case thingy. Revision 29 is mainly about screw hole tolerances for the backplate. Still working on getting a functioning OS. I've been running Phosh on my touchscreen laptop and it's ~fine. I put Ubuntu on this Pi today and then realized I have to set up display drivers for it in order to be able to enter SSH keys. Ugh. If I rebuild this formfactor from scratch, I'm not going to use the Hyperpixel line of square touchscreens; they look cool but they take up GPIO pins needed for other stuff instead of using HDMI plugs. Waveshare has a better package for the same formfactor.
Built the hacked Vindriktning off of the Adafruit tutorial; it does what it says on the box. Still need to calibrate it against the PurpleAir sensor I have, which costs ten times as much.
Need to start Version 2 of the Vakama mask, if I want to print it by Halloween.
Kinda want to make a frogpad-style keyboard with a spare KB2040 microcontroller, a la the Scottopad. But that is a "after Halloween" project.
Also I need to take apart my HTPC projector and put it back together correctly so it doesn't scream.
Aaand I need to put a construction helmet inside a pumpkin. I guess I'll do that offscreen during tomorrow's meetings.
Playing: Got Tears of the Kingdom side quests done except the stable paintings and the last of Misko's set. After that, it's wells and Bubbulfrogs, and I wish there were a way to mute just that one guy's cackles.
Injuries: +1 TDaP booster, +1 knife slip hole in my offhand palm, -$40 to get a new set of fairweather biking gloves after I lost one last weekend biking to get my COVID and flu shots.
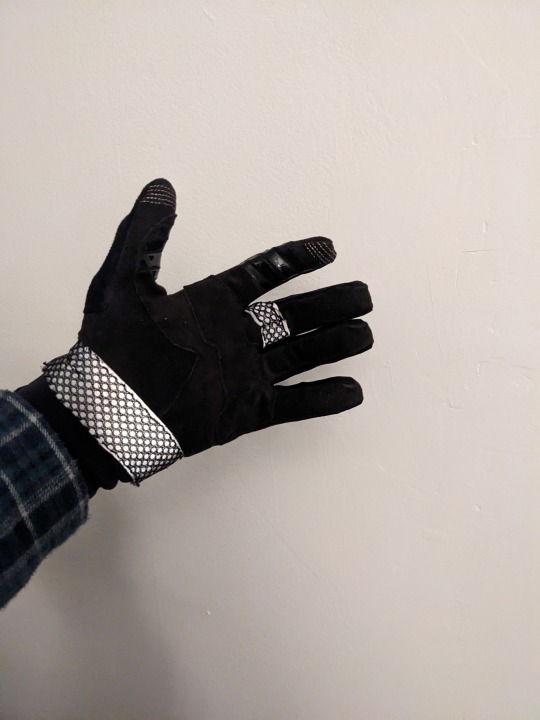
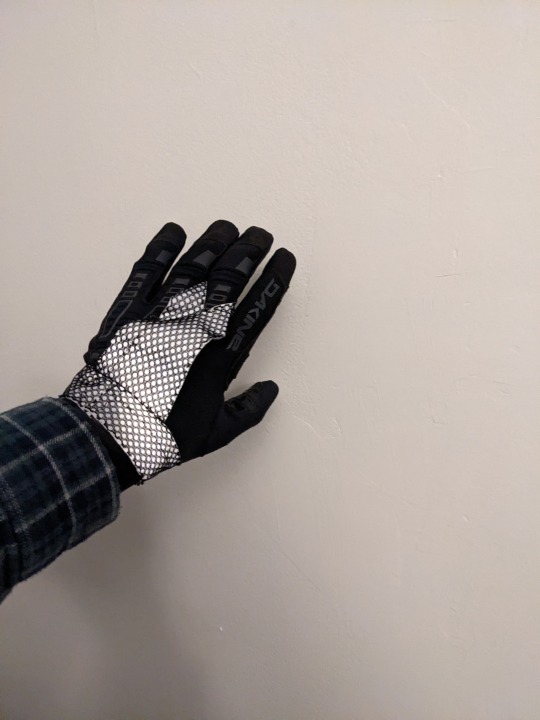
With some retroreflective fabric.
#tuesday again no problem#I will not do all the koroks#tears of the kingdom#vindriktning#princess of Mandalore#unnamed computer project
1 note
·
View note
Text
Wound Wisdom: Lacerations, Incisions, Scrapes, and Bruises
Welcome back to Mangled Mondays, where every Monday we talk about another facet of maiming, mangling, mauling, and mistreating your main characters — and all of their friends.
Today we’ll be talking about Lacerations, Incisions, Scrapes and Bruises. For the rest of the Mangled Mondays series, [click here].
Lacerations, Incisions, Scrapes, and Bruises
A great many of the minor injuries our characters suffer fall into this category. A character might cut their leg climbing over a chain link fence or cut their arm open on a broken bottle after taking a spill in the gutter.
First, let’s do some quick differentiation of terms.
Lacerations and Incisions
A laceration is a cut. Some textbooks describe this as having jagged or uneven edges, while others do not.
An incision is also a cut. This is differentiated from a laceration by the edges being smooth and made by a very sharp object such as a scalpel.
Most of the time, lacerations are unintentional, while incisions are made with a purpose in mind.
Both lacerations and incisions are good candidates for healing well, but either may leave a scar, depending on how they are closed, whether the overlying scab is picked at or scraped, and whether the wound reopens. Cuts over joints tend to have longer healing times because the skin is constantly moving and therefore under tension.
Some cuts require formal wound closure, while others don’t. We’ll get to this in the next chapter.
Contusions
Contusion is a fancy word for a bruise. It’s injury to an area without a break in the skin. (The discoloration from a contusion is also known as ecchymosis, but most medical staff would simply say bruise and move on.) Contusions are caused by damage to minor blood vessels called capillaries, which burst.The blood pools under the skin, causing the familiar discoloration.
Bruises may start off as small red spots of irritation, then blossom blue-black within 24 hours. As they fade, they tend to turn yellow-green. This is due to enzymes breaking down the “loose” blood under the skin.
It was once theorized that the age of a bruise could be guessed by its color, but this doesn’t hold up to science.
Hematomas
A hematoma is a pooling of blood under the skin. It’s like a bruise went 3-D: leaked blood forms a “goose egg” under the skin. Hematomas take longer than bruises to dissipate, up to and including months, but do eventually go down by themselves.
Hematomas are usually treated with cold packs for the first two days, which help to shrink the blood vessels and thus reduce the blood pooling. After two days, heat packs are used to dilate blood vessels and help the blood reabsorb into the tissue.
Abrasions
An abrasion is a five-dollar word for a scrape. (Are doctor’s appointments $5 anymore? I really need to keep up on pricing…) Abrasions are prone to scarring, because large areas of skin have been ripped up, and each individual area of scarring tends to run into the next.
Because the damage from an abrasion tends to be superficial but spread out, and the wound edges tend to be rough, abrasions form large, often unified scabs.
Scabs can be treated simply by protecting them with gauze and allowing them to heal. Topical antibiotics might be used. They can become extremely itchy, which can disturb sleep and impair focus. A scab is a natural sort of bandage to protect the underlying tissue as it heals.
Tetanus Vaccines
Tetanus vaccines are important for characters suffering any injury that punctures the skin, whether it’s from a rusted metal nail or a clean fragment of plastic. Tetanus is caused by a bacterium, C. tetani, which is present in soil, manure, and other places where nature comes into contact with humanity.
The danger of tetanus is not in what punctures the skin, it’s in the type of wound. Because it’s difficult to clean the deep portions of a puncture wound, it’s extremely easy for pockets of infection, known as abscesses, to form in the well of the wound. Tetanus absolutely loves puncture wounds.
Guidelines vary, but characters will need a tetanus vaccine or booster every 5 or 10 years, depending on their doctor’s guidelines. Because there’s little harm to vaccination other than stiffness and pain in the injection site, characters are likely to get or at least be offered tetanus vaccines for any form of penetrating trauma. If it’s been less than 5 years since their last booster, they’ll not be offered one; the 5-10 year mark may or may not get a tetanus booster, and 10 or more years since last vaccination will require a booster.
The vaccine itself is known as Td, which is a combination vaccine that prevents tetanus and diphtheria. (Characters who have never had one may be offered a TdaP, which prevents tetanus, diptheria, and pertussis, also known as whooping cough.)
xoxo, Aunt Scripty
[disclaimer]
This post is an excerpt from Blood on the Page Volume One: A Writer’s Compendium of Injuries. The book details thirty-one injuries with which to maim, mangle, and maul your characters, as well as nine indispensable articles of Wound Wisdom covering everything from burn stages to suture selection.
Print and digital editions are available on [Amazon], and digital editions are available [everywhere else].
Wound Wisdom: Lacerations, Incisions, Scrapes, and Bruises was originally published on ScriptMedicBlog.com
1K notes
·
View notes
Text
Virtual Workshops with Fashion Maestros presents Educational Training Sessions
Virtual Workshops with Fashion Maestros presents Educational Training Sessions
Virtual TEXPO 2021 conducted Virtual Workshops with fashion giants of Pakistan to deliver a learning experience that has been integral to the prestigious platform. Trade Development Authority of Pakistan (TDAP) inaugurated the 1st International Virtual Exhibition, TEXPO 2021 on the 1st of February, held via a digital portal and was live 24/7 for 5 days. In previous editions of TEXPO, TDAP has…

View On WordPress
0 notes
Text
PFDC Sunsilk Fashion Week 2019: Ramping up the Style Quotient on the Final day....
New Post has been published on https://www.hidoose.com/pfdc-sunsilk-fashion-week-2019-ramping-up-the-style-quotient-on-the-final-day/
PFDC Sunsilk Fashion Week 2019: Ramping up the Style Quotient on the Final day....
The Pakistan Fashion Design Council (PFDC) in collaboration with its title sponsor, Sunsilk hosted the third and final day of PFDC Sunsilk Fashion Week on Saturday, 13th April in Lahore.
The 20th consecutive fashion show in line with international standards ended glamorously after three fashion-packed days where 22 designers put forth their exquisite collections. This year PFDC also collaborated with the Trade Development Authority Pakistan (TDAP) to further the channel of communication with international buyers while promoting the business of fashion.
The guests walked down the blue carpet, sponsored by world-class water brand, Aquafina. With TEXPO happening across the venue, the show brought in international buyers allowing them to experience the whole process of hand to loom, to a high fashion set in the evening, making PSFW19 more exciting. Every season, PFDC creates shows that highlight the best of Pakistani fashion and this year was no less. With a wide array of talented and creative designers, the third-day collection showcases ramped up the style quotient. The day opened with afternoon shows where Khas, Sanoor, and Almirah displayed their creations. The evening shows included So Kamal, Zaha by Khadija Shah, Nomi Ansari x Tahura, Republic by Omar Farooq and a grand closing by HSY.
The Pakistan Fashion Design Council is extremely proud to host the 20th consecutive fashion week. Each year, they streamline the process of making the PSFW experience beneficial for stakeholders, benefactors, and fashion enthusiasts – both locally and internationally. Their purpose is to bring the best of fashion trends for each season, all under one roof, showcased by well-established, emerging and debut designers. PFDC works with industry professionals, designers, sponsors and partners that assist in curating a show that enhances their fashion week platforms while helping them maintain the standard of the shows.
Speaking on this occasion, Unilever Pakistan Limited’s Marketing Director for Beauty and Personal Care, Asima Haq explained, “Over the years, Sunsilk has established itself as a beauty brand that helps young Pakistani girls be confident. Since 2010, Sunsilk has been collaborating with PFDC and local designers to bring fashion trends to Pakistani millennials. This year the brand is moving one step forward and opening up more possibilities for young girls who aspire to be part of Pakistan’s fashion industry through our digital platform. We are always delighted to partner with PFDC and hope that our relationship continues to become even stronger over the years. The Council organizes back-to-back Spring and Fall fashion trade events as per the international fashion calendar. It leads the industry through creative influence and is strategically working towards improving the business of fashion while repositioning Pakistani fashion in the global fashion economy.
Khas Stores with Khas Philosophy of quality, innovation, designs and khas trend presented its Khas designer lawn collection. The pieces reflected apparel for comfort, luxury and Khas look. Keeping quality as a priority and innovation as their main goal; Khas proudly presented their wide range of refined products featuring a blend of comfort, luxury and visual appeal that left all awestruck.
Sanoor Introduced a unique eclectic blend of design philosophies, artistic tastes and styles from rich cultures of various civilizations around the world. Taking inspiration from all over the world, the collection unified them with the customary tastes and heritage of Pakistan. The spring summer collection was a combination of pastel colors, exotic flowers, paisleys and oriental ornamentation and much more with a touch of fine embroideries that gave a fresh summer feel.
Almirah represented class and sophistication and signified traditional ideals with modern execution. The creative designs were attuned to rich history and ran deeper than just latest trends. Simple and classically modern. The pieces were impeccably represented the brand’s core values of class, originality, and heritage. Truly, a trendy stitch in time. The collection had a blend of the palette of subtle colors and finest fabric. With a wide range and countless designs, the sherwanis, waistcoats, and formal suits sewn in threads of sophistication and embroidered with the glory of incomparable workmanship. Through the ensembles, audience relived a grandiose era of royalty. Wasim Akram was the showstopper for Almirah.
So Kamal presented a range from morning to evening where a girl can select anything from So Kamal wardrobe. In this millennial era, today’s generation is aware of what’s happening around, how to dress up accordingly to stand out strong. The collection presented a range which was youthful, fun-loving and free-spirited.
Having a palate of brighter tones – florescent accents and Deeper Hues, So Kamal created a wardrobe to cater a woman of every walk of life. They also introduced the Athleisure Line focusing on volume harem pants – cuff jackets and so kamal logo tees. The Evening line consisted of big emphasis on details of Sequence, cut pipes, gottas and beaded embellishments and floral colored embroideries. Ruffles and bows accentuated the mid-day look of the garments. Along with Ethnic-geo motives with luxe skirts, overs sized tunics – adorned capes draped gowns and textured crushed fabrication which enlightened the collection.
An eclectic collection rooted in the glamour and decadence of the eighties. A decade of bold style and even bolder women. The collection comprised of flamboyant yet easy to wear silhouettes featuring clashing animal prints in punchy primary colors. The ‘Wild Things’ glamorous display was a pleasure to watch and remarkably loved by all. Mawra Hocane was the showstopper.
Fashion powerhouse Nomi Ansari joined forces with Pakistan’s leading online sportswear brand, Tuhura Athletics, to debut a luxury active-wear collection. The limited-edition capsule, inspired by the designer’s active on-the-go lifestyle and retro style, featured a variety of silhouettes and colors. The collection ranged from head-to-toe animal prints, full monochromatic studio-to-street styles, fierce neon sets and must-have metallic windbreakers. The display stood out as models strutted down the runway in athleisure wear while busting moves making the walk twice as exciting and fun. The 20 set collection, will be available exclusively from mid-April at www.tuhuraathletics.com. Hania Amir was the showstopper for Nomi Ansari.
A luxury street-wear capsule collection by Republic by Omar Farooq explored the evolution of symbolism from a form of basic communication to that of self-representation and anarchic expression. Much like the clothes that played on the balance between past construction and present deconstruction on a palette of subtle creams just positioned with fluorescent neon shades, challenged the contrasting idea of how the same symbol can be both favorable for one culture and baneful for another. Neon shirts, vests and stripes on single toned suits added a pop of color to sophisticated menswear sprucing up the runway looks. Sheheryar Munawar was the showstopper. The iconic fashion force, Hassan Sheheryar Yasin celebrated 2019 as his 25th year in fashion and one in which he comes full circle with the HSY brand. HSY’s journey has been one with his mother; his guiding light as a strong icon of an empowered and empowering woman. In an ode to their bond, the collection was titled ‘Rani’, his mother’s nickname and ‘queen’. The pieces were a clear depiction of powerful, independent, free-spirited and elegant women. The collection pieces were mostly all red and had patterns which were hand-made and the fabrics used were georgettes woven out of silk yarn, predominately based in a monochromatic color palette ‘red’ because the color has a special significance in HSY’s life as the first color he saw when he got his sight back, 25 years back.
Amongst the tastefully lit lighting and décor were famous faces with the likes of Nasreen Sheikh, Sehyr and Naseem Saigol, Amna Taseer, Wasim Akram, Frieha Altaf, Meera Jee, Mawra Hocane, Sheheryar Munawar, Alyzeh Gabol, Hania Amir and many more. The show was an exceptional preview of what’s in store for Pakistan’s fashion-lovers this Spring/Summer season.
PFDC is proud to continue their partnership with the global giant Unilever’s hair care brand, Sunsilk as their title sponsor and Aquafina as the Blue Carpet and beverage partner. The Media Partner is HUM TV, the Footwear Partner is Borjan, the Fragrance Partner is J. Fragrances, Transportation Partner is Careem, and the Radio Partner is FM 89. The Associate Sponsors are Lipton, Engine, and Almirah.
The teams that brought PSFW’19 together are Sadia Siddiqui of Mustang Productions as the show director, Talking Point as the PR management agency, Nabila as the hair and makeup stylist, Kamiar Rokni as the spokesperson for PFDC, Production 021 for backstage management, technical direction and event consultants, Red Communications for digital support, Rehan Babar as the red carpet host, Restart Branding Solutions for branding and logistics, Empact Activation Services for event architecture and safety, AI Solutions
0 notes
Text
Should Women be Given the Tdap Vaccine During Pregnancy?


Are Vaccines Effective for Pregnant Women? You Decide
by David Brownstein, M.D. Dr. Brownstein's Holistic Medicine
A great debate is raging about whether we should have mandatory vaccination to prevent childhood illnesses. Mandatory vaccination would do away with a religious, ethical, or scientific disapproval of a vaccine.
A study from the University of North Carolina School of Medicine reported that the Tdap vaccination during pregnancy reduced the occurrence of infantile pertussis. (1) (2)
This study is a perfect example of why we need informed consent on the safety and efficacy of vaccines and why we should not have government mandates about vaccines.
The study was published in the June, 2018 edition of the American Journal of Preventive Medicine. Keep in mind that in 2013, the CDC started recommending that all women receive the Tdap vaccine during pregnancy in order to pass passive pertussis immunity to their newborn.
Pertussis is a very serious illness for the newborn. It results in a persistent cough and can result in death of the very young.
I have been very critical about mandates that recommend vaccinating pregnant women when the proper studies have not been done. One way to conduct a proper vaccine study is to compare vaccinated with the unvaccinated.
The UNC study did compare vaccinated with the unvaccinated.
The researchers reviewed more than 675,000 pregnancies from 2010-2014 and analyzed insurance claims data to identify receipt of Tdap during pregnancy. Then, the scientists looked at hospitalizations and outpatient visits for pertussis in the infants through 18 months of age. In the news release describing the success of the Tdap vaccine, the authors stated,
“The clinical outcomes show that the immunity passed from mother to fetus during pregnancy protected the infant during the first six months of life, before the infant completes the full course of the pertussis vaccine themselves.”
Furthermore, they stated,
“The study found that in the first six months of life for infants whose mothers were immunized during pregnancy, there was a 75 percent reduction of pertussis hospitalizations and a 46 percent reduction of any pertussis cases.”
The lead author of the study said,
“This just adds more fuel to the fire for encouraging women to get Tdap during pregnancy,” said Becker-Dreps. “A lot of women are concerned about vaccines in general, but you really might be harming your baby by not getting this vaccine.”
Let's look at the data that lead to those conclusions.
Conclusion 1
The study found that in the first six months of life for infants whose mothers were immunized during pregnancy, there was a 75 percent reduction of pertussis hospitalizations…
The researchers looked at infants admitted to the hospital with pertussis and compared two groups of pregnant women: one group who received the Tdap and the other group that did not.
In the group that received the Tdap vaccine, there were 7 cases of pertussis out of 90,445 newborns. That comes out to a rate of 0.01% (7/90,445). The other group who did not receive the Tdap had 151 cases of pertussis out of 542,380 studied. That equates to a rate of 0.03% (151/542,380).
The authors stated that ”…there was a 75% reduction of pertussis hospitalizations,” in those that received the vaccine. That is true if you are going to use relative risk values.
Relative risk analysis is a statistical method used by Big Pharma to make a poorly performing drug or therapy appear much better than it actually is. Whenever I lecture to medical students or physicians, I spend time teaching them about statistics as nearly all health care professionals know little about statistics.
I emphasize that clinical decisions about whether to use a particular drug or therapy should never be made on relative risk values. The authors simply calculated the relative risk by using the following formula: 0.01%/0.03%. (Note: The numbers are slightly rounded here.)
A more accurate way to assess the effectiveness of vaccinating pregnant women with Tdap to prevent hospitalization from pertussis is to look at the absolute difference in risk.
The absolute difference in risk between vaccinated and unvaccinated in this study is: 0.03% – 0.01% = 0.02%. That means the absolute difference in risk between the two groups is 0.02% or 0.0002.
Once the absolute risk difference is calculated, I can calculate the number of pregnant women that need to be vaccinated with Tdap to prevent one case of hospitalized pertussis.
That number is 5,000 (1/0.0002). Therefore, according to this study, 5,000 pregnant women need to be vaccinated with Tdap to prevent one case of hospitalized pertussis.
A more accurate conclusion the authors should have stated is this:
“This study showed that the Tdap vaccine is 0.02% effective at preventing hospitalization from pertussis. In other words, the vaccine will not benefit 99.98% who take it.”
Conclusion 2
The study found that in the first six months of life for infants whose mothers were immunized during pregnancy, there was a…46 percent reduction of any pertussis cases.
Of course, the 46% reduction cited is the relative risk reduction-remember, relative risk values are used by Big Pharma to make a poorly performing drug or therapy appear better than it actually is.
Let's calculate the absolute risk difference here. In the group of children who had pertussis where the mother did not have a Tdap vaccination, there were 403 cases out of 542,380 which is 0.07%.
In the other group where the mother did have the vaccination there were 32 cases out of 90,445 or 0.04%. The absolute risk difference between the two groups is: 0.03%.
That means that 3,333 women need to be vaccinated during pregnancy to prevent one case of pertussis in the newborn (according to this study).
In other words, this vaccine helps 0.03% who receive it or stated another way, 99.7% who take the vaccine receive no benefit.
The Tdap vaccine contains a known neurotoxin (aluminum) and carcinogen (formadehyde). There are ZERO safety studies shown that it is safe to inject either substance into a human much less a pregnant human.
There are other problems with this study such as the authors having conflicts of interest with vaccine manufacturers and the way they classified infants with pertussis, but I will leave that alone for now.
Still think we don't need accurate disclosures on the safety and effectiveness of vaccines? Do you still want government to dictate what goes in our bodies?
When I was trained, I was taught to be very careful when prescribing any therapy for a pregnant woman. I was always taught to err on the side of caution.
I think that was sage advice.
Tdap for pregnant women? Give women the appropriate information and let them decide.
To All Our Health,
Dr. B
Read the full article at Dr. Brownstein's Holistic Medicine.
See Also:
Study: Flu Shot Associated with Spontaneous Abortion in Pregnant Women
References
(1) http://news.unchealthcare.org/news/2018/june/unc-study-tdap-vaccine-given-during-pregnancy-reduces-occurrence-of-infant-pertussis-reinforces-cdc-recommendations-of-immunization-for-all-mothers
(2) Effectiveness of Prenatal Tetanus, Diphtheria, Acellular Pertussis Vaccination in the Prevention of Infant Pertussis in the U.S. Becker-Dreps, Sylvia et al., American Journal of Preventive Medicine, 2018
<!--//<![CDATA[ var m3_u = (location.protocol=='https:'?'https://network.sophiamedia.com/openx/www/delivery/ajs.php':'http://network.sophiamedia.com/openx/www/delivery/ajs.php'); var m3_r = Math.floor(Math.random()*99999999999); if (!document.MAX_used) document.MAX_used = ','; document.write ("<scr"+"ipt type='text/javascript' src='"+m3_u); document.write ("?zoneid=3&target=_blank"); document.write ('&cb=' + m3_r); if (document.MAX_used != ',') document.write ("&exclude=" + document.MAX_used); document.write (document.charset ? '&charset='+document.charset : (document.characterSet ? '&charset='+document.characterSet : '')); document.write ("&loc=" + escape(window.location)); if (document.referrer) document.write ("&referer=" + escape(document.referrer)); if (document.context) document.write ("&context=" + escape(document.context)); if (document.mmm_fo) document.write ("&mmm_fo=1"); document.write ("'><\/scr"+"ipt>"); //]]>-->

0 notes
Text
Tips on How to Remove Old Shower Tile
As you might have already picked up on previous posts, my Instagram, or if you just have a pretty awesome streak of ESP this week, I’ve decided that my master bathroom is finally going to get my focus this summer. It’s not going to be just my floor that gets some tile help, though — I’m redoing the shower, too!
But before I get into the whole do-it-yourself project of how to tile a new shower (I’ve actually already had some trial and error in the last week I need to share with you, and I’m trying to shoot some video too!), there’s a part of this whole process that I really have a fondness for: DEMO… DEMO… DEMO
However!
Demo isn’t just jump right in, hammers a-swingin’ — if you want to remove an old tiled shower properly and efficiently, you are probably going to need this handy list of tips. Not because I don’t think you aren’t perfectly capable of figuring this out on your own (and a lot of it is common sense, really), but because the temptation to swing a hammer at ugly tile you can’t wait to remove is VERY hard to resist. So, you might be a little premature (like I was) and get all giddy from seeing the tile fall off the wall and ignore some important stuff. These tips will not only help you from damaging the things you don’t want to, but it will prepare yourself a little more than I did to avoid injury.
Affiliate links may be used in this post when linking to products I recommend. Thank you for supporting this site!
How to Demo A Tiled Shower — Effectively and Quickly!
Protect the Tub
In my case, I wanted to keep the tub. So, I laid down some old sheets and taped up the edges with painter’s tape to give the tiles something to land on. The tiles may not seem razor sharp, but if it breaks at a weird angle, it can still chip the tub below. Even if you don’t plan on keeping the tub and want to sell it or something, it’s still better to sell it damage-free. And don’t forget to plug the drain with something!
Start at the Edges
This seems obvious, but outside > in works best. If your shower is as old as mine, you might even have some looser tiles around the tub base and can start there first (and note to self: any areas you find water damage or areas of the tub where water tends to drip should be spots you’re sure to waterproof when you install new tile).
Hammer a Putty Knife at Grout Lines
One of the things I least expected was that using a putty knife blade (more specifically, one of those 6-in-1 painter’s tools) along grout lines and hammering on the end of the handle (sort of like a chisel) before trying to pry at each tile seemed very effective. I tried it mainly out of curiosity at first. My impression was that the tiles were still stuck on pretty well, but I assume the hammering at weak points created enough vibrations to fracture underlying spots of old thinset and grout. I only know that this was more effective than not because I started secretly (aka, unbeknownst to him, but for my own demolishing pride) competing with a very helpful bearded dude who was removing tile on the opposite side of the shower* — I wound up smoking his ass in demo. He swore it was only because I had the better putty knife, and while I can’t deny that I used a better quality tool, after a while he wanted me to whack at the grout lines on his side when mine started coming off in larger chunks.
*And yes, this is how we do date night sometimes, and I really like that we haven’t tried to stab each other with so many weapons tools at our disposal to do so (so far). There were plenty of “this is not how I pictured being in the shower together” jokes made that night.
Wear Protection
You know I’m laughing at myself for yet again having a suggestive tip for DIY, but honestly: if you are regularly doing DIY or woodworking projects and you don’t find yourself thinking “that’s what she said” at least once during each project, you might be doing something wrong. Or don’t have my sense of humor. Or aren’t in the U.S. and haven’t watched The Office (in the British version I’m pretty sure it was “said the actress to the bishop”).
But anyway, back to the important tip: wear ear protection, eye protection, and proper clothing. Hitting anything with a hammer in general tends to be noisy, and tile and grout in particular is very loud. And even if your removal is perfect, tile will chip and send little bits flying, like in parts of the room that might also contain an eye or two. In my case, I wound up with a bloody calf.
…
… (allowing those of you time to scroll past this spot if you don’t like the sight of blood or feet)
It was a small cut, and due to all of the debris falling, it didn’t register that I had been cut until after I was outside about thirty minutes later and felt my leg itching (then looked down and saw that I had been bleeding). It was small and easily dealt with, but still rather surprising! In hindsight, I probably should have worn pants instead of shorts (it’s Georgia summer, though — it’s shorts weather unless something has the potential to be really dangerous). Though now is a pretty good time to remind you guys to be up to date on all of your shots (like a tetanus booster… it’s easy to forget, but if you’re around rusty things and friends having babies like I am, use your friend’s kid’s birthday as a quick reminder of whether or not it’s been less than five years since you got a Tdap update, since you can get tetanus and whooping cough knocked out in one swoop).
Score, Then Hammer Old Drywall
I suppose a person could potentially reuse the old drywall, but with mine so wrecked from old tile adhesive, the easier approach seemed to be to replace the damaged areas. So, we tore into the old drywall with a hammer (so satisfying!) and then broke down the larger pieces for the trash.
To get a clean edge, I first scored the drywall with one of my favorite heavy duty utility knife and then made deeper cuts until it broke away.
Oh – and be mindful of pipes and other things. I reached a stubborn section and realized there was duct work behind the wall, so I’m really glad I wasn’t too aggressive with the hammer. As you weaken each section, the drywall will start to just fold off in pieces.
Take Out Nails/Screws
My house has nails holding up the drywall (this house was built in the early 80’s, so pretty much a house that had a lot of bare-minimum, “I’m going on a break in 5”-type of quality as it was built — if you remember the backyard sinkhole project, you’re already aware of the types of things these guys got away with!), so I had to pry them all out of the studs after the drywall panels came off. The only ones I left were around the bottom near the tub. These seemed to be where the original drywaller rested the old drywall to nail it in, creating a small gap above the tub and wall (this gap is later covered up by the first row of tile, but its function is to help prevent water from wicking up the drywall from the lip and corners of the tub). So, I planned to use the same nails to help me install the new board and give me something to prop it on.
Another thing I noticed that seemed kind of odd? The builders also used glue on the drywall when it came in contact with the studs, but not on most studs or on studs where it might make the most sense (such as near a pipe, where you might not want to chance the nail going in the wrong place). I haven’t really seen this before, so I even texted a couple of DIY buddies and they all thought it was weird, too. If someone has the answer on that, do tell!
Do Some Research
Here’s where I almost failed: I saw that the drywall I was taking out was the moisture-resistant kind, also commonly known as “greenboard” (called that because it’s covered in color-coded green paper to distinguish it from regular drywall). So, I assumed that to begin my new shower, all I needed to do was replace like for like and put it back in. I even did it and started taping the seams:
Except I also knew about waterproofing materials being a thing I’ve seen other people using in DIY projects, and after buying some of it and reading the instructions, I realized that greenboard is actually outdated (and even no longer up to code) for putting in a shower because it often still has moisture problems. I wound up calling a few friends for advice before ripping out the new greenboard and putting cement backerboard in instead. It was not a fun hiccup, considering that these materials are heavy and cumbersome when you want to hang them! But, at least I caught my own mistake before tiling over it or having to rip it out after waterproofing.
Alrighty… so I’ll leave this post as-is for now, but more posts are on their way! Any of your own tips to share? We’ve still got how-tos on replacing the drywall, waterproofing, tiling, and several videos I haven’t even had time to edit yet but I’ve committed to making, so I’m sure I’ll regret that decision later. And on Friday, I’ll cover a trip I took last month that serendipitously inspired my new tile choice. Stay tuned for all of that… definitely more to come.
The post Tips on How to Remove Old Shower Tile appeared first on The Ugly Duckling House.
Website // Subscribe // Advertise // Twitter // Facebook // Google+
Tips on How to Remove Old Shower Tile published first on http://ift.tt/2qxZz2j
0 notes
Text
I think Systlin got her MMR booster, but I wouldn’t put it past the TDAP. My bicep felt like a goose egg was buried in the muscle for over a week, along with similar things you mentioned, so I wouldn’t be surprised. Still, harass the doc if you’re worried about it being anything serious, bc better safe than sorry!
Edit: and congrats on incoming bab! :D
Oh fantastic. I have woken up at 4 AM feeling like I got run over by a truck with The Flu Aches
So now I’m waiting for the painkillers to kick in
432 notes
·
View notes
Text
Tips on How to Remove Old Shower Tile
As you might have already picked up on previous posts, my Instagram, or if you just have a pretty awesome streak of ESP this week, I’ve decided that my master bathroom is finally going to get my focus this summer. It’s not going to be just my floor that gets some tile help, though — I’m redoing the shower, too!
But before I get into the whole do-it-yourself project of how to tile a new shower (I’ve actually already had some trial and error in the last week I need to share with you, and I’m trying to shoot some video too!), there’s a part of this whole process that I really have a fondness for: DEMO… DEMO… DEMO
However!
Demo isn’t just jump right in, hammers a-swingin’ — if you want to remove an old tiled shower properly and efficiently, you are probably going to need this handy list of tips. Not because I don’t think you aren’t perfectly capable of figuring this out on your own (and a lot of it is common sense, really), but because the temptation to swing a hammer at ugly tile you can’t wait to remove is VERY hard to resist. So, you might be a little premature (like I was) and get all giddy from seeing the tile fall off the wall and ignore some important stuff. These tips will not only help you from damaging the things you don’t want to, but it will prepare yourself a little more than I did to avoid injury.
Affiliate links may be used in this post when linking to products I recommend. Thank you for supporting this site!
How to Demo A Tiled Shower — Effectively and Quickly!
Protect the Tub
In my case, I wanted to keep the tub. So, I laid down some old sheets and taped up the edges with painter’s tape to give the tiles something to land on. The tiles may not seem razor sharp, but if it breaks at a weird angle, it can still chip the tub below. Even if you don’t plan on keeping the tub and want to sell it or something, it’s still better to sell it damage-free. And don’t forget to plug the drain with something!
Start at the Edges
This seems obvious, but outside > in works best. If your shower is as old as mine, you might even have some looser tiles around the tub base and can start there first (and note to self: any areas you find water damage or areas of the tub where water tends to drip should be spots you’re sure to waterproof when you install new tile).
Hammer a Putty Knife at Grout Lines
One of the things I least expected was that using a putty knife blade (more specifically, one of those 6-in-1 painter’s tools) along grout lines and hammering on the end of the handle (sort of like a chisel) before trying to pry at each tile seemed very effective. I tried it mainly out of curiosity at first. My impression was that the tiles were still stuck on pretty well, but I assume the hammering at weak points created enough vibrations to fracture underlying spots of old thinset and grout. I only know that this was more effective than not because I started secretly (aka, unbeknownst to him, but for my own demolishing pride) competing with a very helpful bearded dude who was removing tile on the opposite side of the shower* — I wound up smoking his ass in demo. He swore it was only because I had the better putty knife, and while I can’t deny that I used a better quality tool, after a while he wanted me to whack at the grout lines on his side when mine started coming off in larger chunks.
*And yes, this is how we do date night sometimes, and I really like that we haven’t tried to stab each other with so many weapons tools at our disposal to do so (so far). There were plenty of “this is not how I pictured being in the shower together” jokes made that night.
Wear Protection
You know I’m laughing at myself for yet again having a suggestive tip for DIY, but honestly: if you are regularly doing DIY or woodworking projects and you don’t find yourself thinking “that’s what she said” at least once during each project, you might be doing something wrong. Or don’t have my sense of humor. Or aren’t in the U.S. and haven’t watched The Office (in the British version I’m pretty sure it was “said the actress to the bishop”).
But anyway, back to the important tip: wear ear protection, eye protection, and proper clothing. Hitting anything with a hammer in general tends to be noisy, and tile and grout in particular is very loud. And even if your removal is perfect, tile will chip and send little bits flying, like in parts of the room that might also contain an eye or two. In my case, I wound up with a bloody calf.
…
… (allowing those of you time to scroll past this spot if you don’t like the sight of blood or feet)
It was a small cut, and due to all of the debris falling, it didn’t register that I had been cut until after I was outside about thirty minutes later and felt my leg itching (then looked down and saw that I had been bleeding). It was small and easily dealt with, but still rather surprising! In hindsight, I probably should have worn pants instead of shorts (it’s Georgia summer, though — it’s shorts weather unless something has the potential to be really dangerous). Though now is a pretty good time to remind you guys to be up to date on all of your shots (like a tetanus booster… it’s easy to forget, but if you’re around rusty things and friends having babies like I am, use your friend’s kid’s birthday as a quick reminder of whether or not it’s been less than five years since you got a Tdap update, since you can get tetanus and whooping cough knocked out in one swoop).
Score, Then Hammer Old Drywall
I suppose a person could potentially reuse the old drywall, but with mine so wrecked from old tile adhesive, the easier approach seemed to be to replace the damaged areas. So, we tore into the old drywall with a hammer (so satisfying!) and then broke down the larger pieces for the trash.
To get a clean edge, I first scored the drywall with one of my favorite heavy duty utility knife and then made deeper cuts until it broke away.
Oh – and be mindful of pipes and other things. I reached a stubborn section and realized there was duct work behind the wall, so I’m really glad I wasn’t too aggressive with the hammer. As you weaken each section, the drywall will start to just fold off in pieces.
Take Out Nails/Screws
My house has nails holding up the drywall (this house was built in the early 80’s, so pretty much a house that had a lot of bare-minimum, “I’m going on a break in 5”-type of quality as it was built — if you remember the backyard sinkhole project, you’re already aware of the types of things these guys got away with!), so I had to pry them all out of the studs after the drywall panels came off. The only ones I left were around the bottom near the tub. These seemed to be where the original drywaller rested the old drywall to nail it in, creating a small gap above the tub and wall (this gap is later covered up by the first row of tile, but its function is to help prevent water from wicking up the drywall from the lip and corners of the tub). So, I planned to use the same nails to help me install the new board and give me something to prop it on.
Another thing I noticed that seemed kind of odd? The builders also used glue on the drywall when it came in contact with the studs, but not on most studs or on studs where it might make the most sense (such as near a pipe, where you might not want to chance the nail going in the wrong place). I haven’t really seen this before, so I even texted a couple of DIY buddies and they all thought it was weird, too. If someone has the answer on that, do tell!
Do Some Research
Here’s where I almost failed: I saw that the drywall I was taking out was the moisture-resistant kind, also commonly known as “greenboard” (called that because it’s covered in color-coded green paper to distinguish it from regular drywall). So, I assumed that to begin my new shower, all I needed to do was replace like for like and put it back in. I even did it and started taping the seams:
Except I also knew about waterproofing materials being a thing I’ve seen other people using in DIY projects, and after buying some of it and reading the instructions, I realized that greenboard is actually outdated (and even no longer up to code) for putting in a shower because it often still has moisture problems. I wound up calling a few friends for advice before ripping out the new greenboard and putting cement backerboard in instead. It was not a fun hiccup, considering that these materials are heavy and cumbersome when you want to hang them! But, at least I caught my own mistake before tiling over it or having to rip it out after waterproofing.
Alrighty… so I’ll leave this post as-is for now, but more posts are on their way! Any of your own tips to share? We’ve still got how-tos on replacing the drywall, waterproofing, tiling, and several videos I haven’t even had time to edit yet but I’ve committed to making, so I’m sure I’ll regret that decision later. And on Friday, I’ll cover a trip I took last month that serendipitously inspired my new tile choice. Stay tuned for all of that… definitely more to come.
The post Tips on How to Remove Old Shower Tile appeared first on The Ugly Duckling House.
Website // Subscribe // Advertise // Twitter // Facebook // Google+
from mix1 http://ift.tt/2tqY9eG via with this info
0 notes
Text
Tips on How to Remove Old Shower Tile
As you might have already picked up on previous posts, my Instagram, or if you just have a pretty awesome streak of ESP this week, I’ve decided that my master bathroom is finally going to get my focus this summer. It’s not going to be just my floor that gets some tile help, though — I’m redoing the shower, too!
But before I get into the whole do-it-yourself project of how to tile a new shower (I’ve actually already had some trial and error in the last week I need to share with you, and I’m trying to shoot some video too!), there’s a part of this whole process that I really have a fondness for: DEMO… DEMO… DEMO
However!
Demo isn’t just jump right in, hammers a-swingin’ — if you want to remove an old tiled shower properly and efficiently, you are probably going to need this handy list of tips. Not because I don’t think you aren’t perfectly capable of figuring this out on your own (and a lot of it is common sense, really), but because the temptation to swing a hammer at ugly tile you can’t wait to remove is VERY hard to resist. So, you might be a little premature (like I was) and get all giddy from seeing the tile fall off the wall and ignore some important stuff. These tips will not only help you from damaging the things you don’t want to, but it will prepare yourself a little more than I did to avoid injury.
Affiliate links may be used in this post when linking to products I recommend. Thank you for supporting this site!
How to Demo A Tiled Shower — Effectively and Quickly!
Protect the Tub
In my case, I wanted to keep the tub. So, I laid down some old sheets and taped up the edges with painter’s tape to give the tiles something to land on. The tiles may not seem razor sharp, but if it breaks at a weird angle, it can still chip the tub below. Even if you don’t plan on keeping the tub and want to sell it or something, it’s still better to sell it damage-free. And don’t forget to plug the drain with something!
Start at the Edges
This seems obvious, but outside > in works best. If your shower is as old as mine, you might even have some looser tiles around the tub base and can start there first (and note to self: any areas you find water damage or areas of the tub where water tends to drip should be spots you’re sure to waterproof when you install new tile).
Hammer a Putty Knife at Grout Lines
One of the things I least expected was that using a putty knife blade (more specifically, one of those 6-in-1 painter’s tools) along grout lines and hammering on the end of the handle (sort of like a chisel) before trying to pry at each tile seemed very effective. I tried it mainly out of curiosity at first. My impression was that the tiles were still stuck on pretty well, but I assume the hammering at weak points created enough vibrations to fracture underlying spots of old thinset and grout. I only know that this was more effective than not because I started secretly (aka, unbeknownst to him, but for my own demolishing pride) competing with a very helpful bearded dude who was removing tile on the opposite side of the shower* — I wound up smoking his ass in demo. He swore it was only because I had the better putty knife, and while I can’t deny that I used a better quality tool, after a while he wanted me to whack at the grout lines on his side when mine started coming off in larger chunks.
*And yes, this is how we do date night sometimes, and I really like that we haven’t tried to stab each other with so many weapons tools at our disposal to do so (so far). There were plenty of “this is not how I pictured being in the shower together” jokes made that night.
Wear Protection
You know I’m laughing at myself for yet again having a suggestive tip for DIY, but honestly: if you are regularly doing DIY or woodworking projects and you don’t find yourself thinking “that’s what she said” at least once during each project, you might be doing something wrong. Or don’t have my sense of humor. Or aren’t in the U.S. and haven’t watched The Office (in the British version I’m pretty sure it was “said the actress to the bishop”).
But anyway, back to the important tip: wear ear protection, eye protection, and proper clothing. Hitting anything with a hammer in general tends to be noisy, and tile and grout in particular is very loud. And even if your removal is perfect, tile will chip and send little bits flying, like in parts of the room that might also contain an eye or two. In my case, I wound up with a bloody calf.
…
… (allowing those of you time to scroll past this spot if you don’t like the sight of blood or feet)
It was a small cut, and due to all of the debris falling, it didn’t register that I had been cut until after I was outside about thirty minutes later and felt my leg itching (then looked down and saw that I had been bleeding). It was small and easily dealt with, but still rather surprising! In hindsight, I probably should have worn pants instead of shorts (it’s Georgia summer, though — it’s shorts weather unless something has the potential to be really dangerous). Though now is a pretty good time to remind you guys to be up to date on all of your shots (like a tetanus booster… it’s easy to forget, but if you’re around rusty things and friends having babies like I am, use your friend’s kid’s birthday as a quick reminder of whether or not it’s been less than five years since you got a Tdap update, since you can get tetanus and whooping cough knocked out in one swoop).
Score, Then Hammer Old Drywall
I suppose a person could potentially reuse the old drywall, but with mine so wrecked from old tile adhesive, the easier approach seemed to be to replace the damaged areas. So, we tore into the old drywall with a hammer (so satisfying!) and then broke down the larger pieces for the trash.
To get a clean edge, I first scored the drywall with one of my favorite heavy duty utility knife and then made deeper cuts until it broke away.
Oh – and be mindful of pipes and other things. I reached a stubborn section and realized there was duct work behind the wall, so I’m really glad I wasn’t too aggressive with the hammer. As you weaken each section, the drywall will start to just fold off in pieces.
Take Out Nails/Screws
My house has nails holding up the drywall (this house was built in the early 80’s, so pretty much a house that had a lot of bare-minimum, “I’m going on a break in 5”-type of quality as it was built — if you remember the backyard sinkhole project, you’re already aware of the types of things these guys got away with!), so I had to pry them all out of the studs after the drywall panels came off. The only ones I left were around the bottom near the tub. These seemed to be where the original drywaller rested the old drywall to nail it in, creating a small gap above the tub and wall (this gap is later covered up by the first row of tile, but its function is to help prevent water from wicking up the drywall from the lip and corners of the tub). So, I planned to use the same nails to help me install the new board and give me something to prop it on.
Another thing I noticed that seemed kind of odd? The builders also used glue on the drywall when it came in contact with the studs, but not on most studs or on studs where it might make the most sense (such as near a pipe, where you might not want to chance the nail going in the wrong place). I haven’t really seen this before, so I even texted a couple of DIY buddies and they all thought it was weird, too. If someone has the answer on that, do tell!
Do Some Research
Here’s where I almost failed: I saw that the drywall I was taking out was the moisture-resistant kind, also commonly known as “greenboard” (called that because it’s covered in color-coded green paper to distinguish it from regular drywall). So, I assumed that to begin my new shower, all I needed to do was replace like for like and put it back in. I even did it and started taping the seams:
Except I also knew about waterproofing materials being a thing I’ve seen other people using in DIY projects, and after buying some of it and reading the instructions, I realized that greenboard is actually outdated (and even no longer up to code) for putting in a shower because it often still has moisture problems. I wound up calling a few friends for advice before ripping out the new greenboard and putting cement backerboard in instead. It was not a fun hiccup, considering that these materials are heavy and cumbersome when you want to hang them! But, at least I caught my own mistake before tiling over it or having to rip it out after waterproofing.
Alrighty… so I’ll leave this post as-is for now, but more posts are on their way! Any of your own tips to share? We’ve still got how-tos on replacing the drywall, waterproofing, tiling, and several videos I haven’t even had time to edit yet but I’ve committed to making, so I’m sure I’ll regret that decision later. And on Friday, I’ll cover a trip I took last month that serendipitously inspired my new tile choice. Stay tuned for all of that… definitely more to come.
The post Tips on How to Remove Old Shower Tile appeared first on The Ugly Duckling House.
Website // Subscribe // Advertise // Twitter // Facebook // Google+
from car2 http://ift.tt/2tqY9eG via as shown a lot
0 notes
Text
Tips on How to Remove Old Shower Tile
As you might have already picked up on previous posts, my Instagram, or if you just have a pretty awesome streak of ESP this week, I’ve decided that my master bathroom is finally going to get my focus this summer. It’s not going to be just my floor that gets some tile help, though — I’m redoing the shower, too!
But before I get into the whole do-it-yourself project of how to tile a new shower (I’ve actually already had some trial and error in the last week I need to share with you, and I’m trying to shoot some video too!), there’s a part of this whole process that I really have a fondness for: DEMO… DEMO… DEMO
However!
Demo isn’t just jump right in, hammers a-swingin’ — if you want to remove an old tiled shower properly and efficiently, you are probably going to need this handy list of tips. Not because I don’t think you aren’t perfectly capable of figuring this out on your own (and a lot of it is common sense, really), but because the temptation to swing a hammer at ugly tile you can’t wait to remove is VERY hard to resist. So, you might be a little premature (like I was) and get all giddy from seeing the tile fall off the wall and ignore some important stuff. These tips will not only help you from damaging the things you don’t want to, but it will prepare yourself a little more than I did to avoid injury.
Affiliate links may be used in this post when linking to products I recommend. Thank you for supporting this site!
How to Demo A Tiled Shower — Effectively and Quickly!
Protect the Tub
In my case, I wanted to keep the tub. So, I laid down some old sheets and taped up the edges with painter’s tape to give the tiles something to land on. The tiles may not seem razor sharp, but if it breaks at a weird angle, it can still chip the tub below. Even if you don’t plan on keeping the tub and want to sell it or something, it’s still better to sell it damage-free. And don’t forget to plug the drain with something!
Start at the Edges
This seems obvious, but outside > in works best. If your shower is as old as mine, you might even have some looser tiles around the tub base and can start there first (and note to self: any areas you find water damage or areas of the tub where water tends to drip should be spots you’re sure to waterproof when you install new tile).
Hammer a Putty Knife at Grout Lines
One of the things I least expected was that using a putty knife blade (more specifically, one of those 6-in-1 painter’s tools) along grout lines and hammering on the end of the handle (sort of like a chisel) before trying to pry at each tile seemed very effective. I tried it mainly out of curiosity at first. My impression was that the tiles were still stuck on pretty well, but I assume the hammering at weak points created enough vibrations to fracture underlying spots of old thinset and grout. I only know that this was more effective than not because I started secretly (aka, unbeknownst to him, but for my own demolishing pride) competing with a very helpful bearded dude who was removing tile on the opposite side of the shower* — I wound up smoking his ass in demo. He swore it was only because I had the better putty knife, and while I can’t deny that I used a better quality tool, after a while he wanted me to whack at the grout lines on his side when mine started coming off in larger chunks.
*And yes, this is how we do date night sometimes, and I really like that we haven’t tried to stab each other with so many weapons tools at our disposal to do so (so far). There were plenty of “this is not how I pictured being in the shower together” jokes made that night.
Wear Protection
You know I’m laughing at myself for yet again having a suggestive tip for DIY, but honestly: if you are regularly doing DIY or woodworking projects and you don’t find yourself thinking “that’s what she said” at least once during each project, you might be doing something wrong. Or don’t have my sense of humor. Or aren’t in the U.S. and haven’t watched The Office (in the British version I’m pretty sure it was “said the actress to the bishop”).
But anyway, back to the important tip: wear ear protection, eye protection, and proper clothing. Hitting anything with a hammer in general tends to be noisy, and tile and grout in particular is very loud. And even if your removal is perfect, tile will chip and send little bits flying, like in parts of the room that might also contain an eye or two. In my case, I wound up with a bloody calf.
…
… (allowing those of you time to scroll past this spot if you don’t like the sight of blood or feet)
It was a small cut, and due to all of the debris falling, it didn’t register that I had been cut until after I was outside about thirty minutes later and felt my leg itching (then looked down and saw that I had been bleeding). It was small and easily dealt with, but still rather surprising! In hindsight, I probably should have worn pants instead of shorts (it’s Georgia summer, though — it’s shorts weather unless something has the potential to be really dangerous). Though now is a pretty good time to remind you guys to be up to date on all of your shots (like a tetanus booster… it’s easy to forget, but if you’re around rusty things and friends having babies like I am, use your friend’s kid’s birthday as a quick reminder of whether or not it’s been less than five years since you got a Tdap update, since you can get tetanus and whooping cough knocked out in one swoop).
Score, Then Hammer Old Drywall
I suppose a person could potentially reuse the old drywall, but with mine so wrecked from old tile adhesive, the easier approach seemed to be to replace the damaged areas. So, we tore into the old drywall with a hammer (so satisfying!) and then broke down the larger pieces for the trash.
To get a clean edge, I first scored the drywall with one of my favorite heavy duty utility knife and then made deeper cuts until it broke away.
Oh – and be mindful of pipes and other things. I reached a stubborn section and realized there was duct work behind the wall, so I’m really glad I wasn’t too aggressive with the hammer. As you weaken each section, the drywall will start to just fold off in pieces.
Take Out Nails/Screws
My house has nails holding up the drywall (this house was built in the early 80’s, so pretty much a house that had a lot of bare-minimum, “I’m going on a break in 5”-type of quality as it was built — if you remember the backyard sinkhole project, you’re already aware of the types of things these guys got away with!), so I had to pry them all out of the studs after the drywall panels came off. The only ones I left were around the bottom near the tub. These seemed to be where the original drywaller rested the old drywall to nail it in, creating a small gap above the tub and wall (this gap is later covered up by the first row of tile, but its function is to help prevent water from wicking up the drywall from the lip and corners of the tub). So, I planned to use the same nails to help me install the new board and give me something to prop it on.
Another thing I noticed that seemed kind of odd? The builders also used glue on the drywall when it came in contact with the studs, but not on most studs or on studs where it might make the most sense (such as near a pipe, where you might not want to chance the nail going in the wrong place). I haven’t really seen this before, so I even texted a couple of DIY buddies and they all thought it was weird, too. If someone has the answer on that, do tell!
Do Some Research
Here’s where I almost failed: I saw that the drywall I was taking out was the moisture-resistant kind, also commonly known as “greenboard” (called that because it’s covered in color-coded green paper to distinguish it from regular drywall). So, I assumed that to begin my new shower, all I needed to do was replace like for like and put it back in. I even did it and started taping the seams:
Except I also knew about waterproofing materials being a thing I’ve seen other people using in DIY projects, and after buying some of it and reading the instructions, I realized that greenboard is actually outdated (and even no longer up to code) for putting in a shower because it often still has moisture problems. I wound up calling a few friends for advice before ripping out the new greenboard and putting cement backerboard in instead. It was not a fun hiccup, considering that these materials are heavy and cumbersome when you want to hang them! But, at least I caught my own mistake before tiling over it or having to rip it out after waterproofing.
Alrighty… so I’ll leave this post as-is for now, but more posts are on their way! Any of your own tips to share? We’ve still got how-tos on replacing the drywall, waterproofing, tiling, and several videos I haven’t even had time to edit yet but I’ve committed to making, so I’m sure I’ll regret that decision later. And on Friday, I’ll cover a trip I took last month that serendipitously inspired my new tile choice. Stay tuned for all of that… definitely more to come.
The post Tips on How to Remove Old Shower Tile appeared first on The Ugly Duckling House.
Website // Subscribe // Advertise // Twitter // Facebook // Google+
Tips on How to Remove Old Shower Tile posted first on http://ift.tt/2qOPBf9
0 notes
Text
Tips on How to Remove Old Shower Tile
As you might have already picked up on previous posts, my Instagram, or if you just have a pretty awesome streak of ESP this week, I’ve decided that my master bathroom is finally going to get my focus this summer. It’s not going to be just my floor that gets some tile help, though — I’m redoing the shower, too!
But before I get into the whole do-it-yourself project of how to tile a new shower (I’ve actually already had some trial and error in the last week I need to share with you, and I’m trying to shoot some video too!), there’s a part of this whole process that I really have a fondness for: DEMO… DEMO… DEMO
However!
Demo isn’t just jump right in, hammers a-swingin’ — if you want to remove an old tiled shower properly and efficiently, you are probably going to need this handy list of tips. Not because I don’t think you aren’t perfectly capable of figuring this out on your own (and a lot of it is common sense, really), but because the temptation to swing a hammer at ugly tile you can’t wait to remove is VERY hard to resist. So, you might be a little premature (like I was) and get all giddy from seeing the tile fall off the wall and ignore some important stuff. These tips will not only help you from damaging the things you don’t want to, but it will prepare yourself a little more than I did to avoid injury.
Affiliate links may be used in this post when linking to products I recommend. Thank you for supporting this site!
How to Demo A Tiled Shower — Effectively and Quickly!
Protect the Tub
In my case, I wanted to keep the tub. So, I laid down some old sheets and taped up the edges with painter’s tape to give the tiles something to land on. The tiles may not seem razor sharp, but if it breaks at a weird angle, it can still chip the tub below. Even if you don’t plan on keeping the tub and want to sell it or something, it’s still better to sell it damage-free. And don’t forget to plug the drain with something!
Start at the Edges
This seems obvious, but outside > in works best. If your shower is as old as mine, you might even have some looser tiles around the tub base and can start there first (and note to self: any areas you find water damage or areas of the tub where water tends to drip should be spots you’re sure to waterproof when you install new tile).
Hammer a Putty Knife at Grout Lines
One of the things I least expected was that using a putty knife blade (more specifically, one of those 6-in-1 painter’s tools) along grout lines and hammering on the end of the handle (sort of like a chisel) before trying to pry at each tile seemed very effective. I tried it mainly out of curiosity at first. My impression was that the tiles were still stuck on pretty well, but I assume the hammering at weak points created enough vibrations to fracture underlying spots of old thinset and grout. I only know that this was more effective than not because I started secretly (aka, unbeknownst to him, but for my own demolishing pride) competing with a very helpful bearded dude who was removing tile on the opposite side of the shower* — I wound up smoking his ass in demo. He swore it was only because I had the better putty knife, and while I can’t deny that I used a better quality tool, after a while he wanted me to whack at the grout lines on his side when mine started coming off in larger chunks.
*And yes, this is how we do date night sometimes, and I really like that we haven’t tried to stab each other with so many weapons tools at our disposal to do so (so far). There were plenty of “this is not how I pictured being in the shower together” jokes made that night.
Wear Protection
You know I’m laughing at myself for yet again having a suggestive tip for DIY, but honestly: if you are regularly doing DIY or woodworking projects and you don’t find yourself thinking “that’s what she said” at least once during each project, you might be doing something wrong. Or don’t have my sense of humor. Or aren’t in the U.S. and haven’t watched The Office (in the British version I’m pretty sure it was “said the actress to the bishop”).
But anyway, back to the important tip: wear ear protection, eye protection, and proper clothing. Hitting anything with a hammer in general tends to be noisy, and tile and grout in particular is very loud. And even if your removal is perfect, tile will chip and send little bits flying, like in parts of the room that might also contain an eye or two. In my case, I wound up with a bloody calf.
…
… (allowing those of you time to scroll past this spot if you don’t like the sight of blood or feet)
It was a small cut, and due to all of the debris falling, it didn’t register that I had been cut until after I was outside about thirty minutes later and felt my leg itching (then looked down and saw that I had been bleeding). It was small and easily dealt with, but still rather surprising! In hindsight, I probably should have worn pants instead of shorts (it’s Georgia summer, though — it’s shorts weather unless something has the potential to be really dangerous). Though now is a pretty good time to remind you guys to be up to date on all of your shots (like a tetanus booster… it’s easy to forget, but if you’re around rusty things and friends having babies like I am, use your friend’s kid’s birthday as a quick reminder of whether or not it’s been less than five years since you got a Tdap update, since you can get tetanus and whooping cough knocked out in one swoop).
Score, Then Hammer Old Drywall
I suppose a person could potentially reuse the old drywall, but with mine so wrecked from old tile adhesive, the easier approach seemed to be to replace the damaged areas. So, we tore into the old drywall with a hammer (so satisfying!) and then broke down the larger pieces for the trash.
To get a clean edge, I first scored the drywall with one of my favorite heavy duty utility knife and then made deeper cuts until it broke away.
Oh – and be mindful of pipes and other things. I reached a stubborn section and realized there was duct work behind the wall, so I’m really glad I wasn’t too aggressive with the hammer. As you weaken each section, the drywall will start to just fold off in pieces.
Take Out Nails/Screws
My house has nails holding up the drywall (this house was built in the early 80’s, so pretty much a house that had a lot of bare-minimum, “I’m going on a break in 5”-type of quality as it was built — if you remember the backyard sinkhole project, you’re already aware of the types of things these guys got away with!), so I had to pry them all out of the studs after the drywall panels came off. The only ones I left were around the bottom near the tub. These seemed to be where the original drywaller rested the old drywall to nail it in, creating a small gap above the tub and wall (this gap is later covered up by the first row of tile, but its function is to help prevent water from wicking up the drywall from the lip and corners of the tub). So, I planned to use the same nails to help me install the new board and give me something to prop it on.
Another thing I noticed that seemed kind of odd? The builders also used glue on the drywall when it came in contact with the studs, but not on most studs or on studs where it might make the most sense (such as near a pipe, where you might not want to chance the nail going in the wrong place). I haven’t really seen this before, so I even texted a couple of DIY buddies and they all thought it was weird, too. If someone has the answer on that, do tell!
Do Some Research
Here’s where I almost failed: I saw that the drywall I was taking out was the moisture-resistant kind, also commonly known as “greenboard” (called that because it’s covered in color-coded green paper to distinguish it from regular drywall). So, I assumed that to begin my new shower, all I needed to do was replace like for like and put it back in. I even did it and started taping the seams:
Except I also knew about waterproofing materials being a thing I’ve seen other people using in DIY projects, and after buying some of it and reading the instructions, I realized that greenboard is actually outdated (and even no longer up to code) for putting in a shower because it often still has moisture problems. I wound up calling a few friends for advice before ripping out the new greenboard and putting cement backerboard in instead. It was not a fun hiccup, considering that these materials are heavy and cumbersome when you want to hang them! But, at least I caught my own mistake before tiling over it or having to rip it out after waterproofing.
Alrighty… so I’ll leave this post as-is for now, but more posts are on their way! Any of your own tips to share? We’ve still got how-tos on replacing the drywall, waterproofing, tiling, and several videos I haven’t even had time to edit yet but I’ve committed to making, so I’m sure I’ll regret that decision later. And on Friday, I’ll cover a trip I took last month that serendipitously inspired my new tile choice. Stay tuned for all of that… definitely more to come.
The post Tips on How to Remove Old Shower Tile appeared first on The Ugly Duckling House.
Website // Subscribe // Advertise // Twitter // Facebook // Google+
from The Ugly Duckling House https://www.uglyducklinghouse.com/tips-remove-old-shower-tile/
0 notes
Text
Tips on How to Remove Old Shower Tile
As you might have already picked up on previous posts, my Instagram, or if you just have a pretty awesome streak of ESP this week, I’ve decided that my master bathroom is finally going to get my focus this summer. It’s not going to be just my floor that gets some tile help, though — I’m redoing the shower, too!
But before I get into the whole do-it-yourself project of how to tile a new shower (I’ve actually already had some trial and error in the last week I need to share with you, and I’m trying to shoot some video too!), there’s a part of this whole process that I really have a fondness for: DEMO… DEMO… DEMO
However!
Demo isn’t just jump right in, hammers a-swingin’ — if you want to remove an old tiled shower properly and efficiently, you are probably going to need this handy list of tips. Not because I don’t think you aren’t perfectly capable of figuring this out on your own (and a lot of it is common sense, really), but because the temptation to swing a hammer at ugly tile you can’t wait to remove is VERY hard to resist. So, you might be a little premature (like I was) and get all giddy from seeing the tile fall off the wall and ignore some important stuff. These tips will not only help you from damaging the things you don’t want to, but it will prepare yourself a little more than I did to avoid injury.
Affiliate links may be used in this post when linking to products I recommend. Thank you for supporting this site!
How to Demo A Tiled Shower — Effectively and Quickly!
Protect the Tub
In my case, I wanted to keep the tub. So, I laid down some old sheets and taped up the edges with painter’s tape to give the tiles something to land on. The tiles may not seem razor sharp, but if it breaks at a weird angle, it can still chip the tub below. Even if you don’t plan on keeping the tub and want to sell it or something, it’s still better to sell it damage-free. And don’t forget to plug the drain with something!
Start at the Edges
This seems obvious, but outside > in works best. If your shower is as old as mine, you might even have some looser tiles around the tub base and can start there first (and note to self: any areas you find water damage or areas of the tub where water tends to drip should be spots you’re sure to waterproof when you install new tile).
Hammer a Putty Knife at Grout Lines
One of the things I least expected was that using a putty knife blade (more specifically, one of those 6-in-1 painter’s tools) along grout lines and hammering on the end of the handle (sort of like a chisel) before trying to pry at each tile seemed very effective. I tried it mainly out of curiosity at first. My impression was that the tiles were still stuck on pretty well, but I assume the hammering at weak points created enough vibrations to fracture underlying spots of old thinset and grout. I only know that this was more effective than not because I started secretly (aka, unbeknownst to him, but for my own demolishing pride) competing with a very helpful bearded dude who was removing tile on the opposite side of the shower* — I wound up smoking his ass in demo. He swore it was only because I had the better putty knife, and while I can’t deny that I used a better quality tool, after a while he wanted me to whack at the grout lines on his side when mine started coming off in larger chunks.
*And yes, this is how we do date night sometimes, and I really like that we haven’t tried to stab each other with so many weapons tools at our disposal to do so (so far). There were plenty of “this is not how I pictured being in the shower together” jokes made that night.
Wear Protection
You know I’m laughing at myself for yet again having a suggestive tip for DIY, but honestly: if you are regularly doing DIY or woodworking projects and you don’t find yourself thinking “that’s what she said” at least once during each project, you might be doing something wrong. Or don’t have my sense of humor. Or aren’t in the U.S. and haven’t watched The Office (in the British version I’m pretty sure it was “said the actress to the bishop”).
But anyway, back to the important tip: wear ear protection, eye protection, and proper clothing. Hitting anything with a hammer in general tends to be noisy, and tile and grout in particular is very loud. And even if your removal is perfect, tile will chip and send little bits flying, like in parts of the room that might also contain an eye or two. In my case, I wound up with a bloody calf.
…
… (allowing those of you time to scroll past this spot if you don’t like the sight of blood or feet)
It was a small cut, and due to all of the debris falling, it didn’t register that I had been cut until after I was outside about thirty minutes later and felt my leg itching (then looked down and saw that I had been bleeding). It was small and easily dealt with, but still rather surprising! In hindsight, I probably should have worn pants instead of shorts (it’s Georgia summer, though — it’s shorts weather unless something has the potential to be really dangerous). Though now is a pretty good time to remind you guys to be up to date on all of your shots (like a tetanus booster… it’s easy to forget, but if you’re around rusty things and friends having babies like I am, use your friend’s kid’s birthday as a quick reminder of whether or not it’s been less than five years since you got a Tdap update, since you can get tetanus and whooping cough knocked out in one swoop).
Score, Then Hammer Old Drywall
I suppose a person could potentially reuse the old drywall, but with mine so wrecked from old tile adhesive, the easier approach seemed to be to replace the damaged areas. So, we tore into the old drywall with a hammer (so satisfying!) and then broke down the larger pieces for the trash.
To get a clean edge, I first scored the drywall with one of my favorite heavy duty utility knife and then made deeper cuts until it broke away.
Oh – and be mindful of pipes and other things. I reached a stubborn section and realized there was duct work behind the wall, so I’m really glad I wasn’t too aggressive with the hammer. As you weaken each section, the drywall will start to just fold off in pieces.
Take Out Nails/Screws
My house has nails holding up the drywall (this house was built in the early 80’s, so pretty much a house that had a lot of bare-minimum, “I’m going on a break in 5”-type of quality as it was built — if you remember the backyard sinkhole project, you’re already aware of the types of things these guys got away with!), so I had to pry them all out of the studs after the drywall panels came off. The only ones I left were around the bottom near the tub. These seemed to be where the original drywaller rested the old drywall to nail it in, creating a small gap above the tub and wall (this gap is later covered up by the first row of tile, but its function is to help prevent water from wicking up the drywall from the lip and corners of the tub). So, I planned to use the same nails to help me install the new board and give me something to prop it on.
Another thing I noticed that seemed kind of odd? The builders also used glue on the drywall when it came in contact with the studs, but not on most studs or on studs where it might make the most sense (such as near a pipe, where you might not want to chance the nail going in the wrong place). I haven’t really seen this before, so I even texted a couple of DIY buddies and they all thought it was weird, too. If someone has the answer on that, do tell!
Do Some Research
Here’s where I almost failed: I saw that the drywall I was taking out was the moisture-resistant kind, also commonly known as “greenboard” (called that because it’s covered in color-coded green paper to distinguish it from regular drywall). So, I assumed that to begin my new shower, all I needed to do was replace like for like and put it back in. I even did it and started taping the seams:
Except I also knew about waterproofing materials being a thing I’ve seen other people using in DIY projects, and after buying some of it and reading the instructions, I realized that greenboard is actually outdated (and even no longer up to code) for putting in a shower because it often still has moisture problems. I wound up calling a few friends for advice before ripping out the new greenboard and putting cement backerboard in instead. It was not a fun hiccup, considering that these materials are heavy and cumbersome when you want to hang them! But, at least I caught my own mistake before tiling over it or having to rip it out after waterproofing.
Alrighty… so I’ll leave this post as-is for now, but more posts are on their way! Any of your own tips to share? We’ve still got how-tos on replacing the drywall, waterproofing, tiling, and several videos I haven’t even had time to edit yet but I’ve committed to making, so I’m sure I’ll regret that decision later. And on Friday, I’ll cover a trip I took last month that serendipitously inspired my new tile choice. Stay tuned for all of that… definitely more to come.
The post Tips on How to Remove Old Shower Tile appeared first on The Ugly Duckling House.
Website // Subscribe // Advertise // Twitter // Facebook // Google+
Tips on How to Remove Old Shower Tile published first on https://noambouzaglou.wordpress.com/
0 notes
Text
Tips on How to Remove Old Shower Tile
As you might have already picked up on previous posts, my Instagram, or if you just have a pretty awesome streak of ESP this week, I’ve decided that my master bathroom is finally going to get my focus this summer. It’s not going to be just my floor that gets some tile help, though — I’m redoing the shower, too!
But before I get into the whole do-it-yourself project of how to tile a new shower (I’ve actually already had some trial and error in the last week I need to share with you, and I’m trying to shoot some video too!), there’s a part of this whole process that I really have a fondness for: DEMO… DEMO… DEMO
However!
Demo isn’t just jump right in, hammers a-swingin’ — if you want to remove an old tiled shower properly and efficiently, you are probably going to need this handy list of tips. Not because I don’t think you aren’t perfectly capable of figuring this out on your own (and a lot of it is common sense, really), but because the temptation to swing a hammer at ugly tile you can’t wait to remove is VERY hard to resist. So, you might be a little premature (like I was) and get all giddy from seeing the tile fall off the wall and ignore some important stuff. These tips will not only help you from damaging the things you don’t want to, but it will prepare yourself a little more than I did to avoid injury.
Affiliate links may be used in this post when linking to products I recommend. Thank you for supporting this site!
How to Demo A Tiled Shower — Effectively and Quickly!
Protect the Tub
In my case, I wanted to keep the tub. So, I laid down some old sheets and taped up the edges with painter’s tape to give the tiles something to land on. The tiles may not seem razor sharp, but if it breaks at a weird angle, it can still chip the tub below. Even if you don’t plan on keeping the tub and want to sell it or something, it’s still better to sell it damage-free. And don’t forget to plug the drain with something!
Start at the Edges
This seems obvious, but outside > in works best. If your shower is as old as mine, you might even have some looser tiles around the tub base and can start there first (and note to self: any areas you find water damage or areas of the tub where water tends to drip should be spots you’re sure to waterproof when you install new tile).
Hammer a Putty Knife at Grout Lines
One of the things I least expected was that using a putty knife blade (more specifically, one of those 6-in-1 painter’s tools) along grout lines and hammering on the end of the handle (sort of like a chisel) before trying to pry at each tile seemed very effective. I tried it mainly out of curiosity at first. My impression was that the tiles were still stuck on pretty well, but I assume the hammering at weak points created enough vibrations to fracture underlying spots of old thinset and grout. I only know that this was more effective than not because I started secretly (aka, unbeknownst to him, but for my own demolishing pride) competing with a very helpful bearded dude who was removing tile on the opposite side of the shower* — I wound up smoking his ass in demo. He swore it was only because I had the better putty knife, and while I can’t deny that I used a better quality tool, after a while he wanted me to whack at the grout lines on his side when mine started coming off in larger chunks.
*And yes, this is how we do date night sometimes, and I really like that we haven’t tried to stab each other with so many weapons tools at our disposal to do so (so far). There were plenty of “this is not how I pictured being in the shower together” jokes made that night.
Wear Protection
You know I’m laughing at myself for yet again having a suggestive tip for DIY, but honestly: if you are regularly doing DIY or woodworking projects and you don’t find yourself thinking “that’s what she said” at least once during each project, you might be doing something wrong. Or don’t have my sense of humor. Or aren’t in the U.S. and haven’t watched The Office (in the British version I’m pretty sure it was “said the actress to the bishop”).
But anyway, back to the important tip: wear ear protection, eye protection, and proper clothing. Hitting anything with a hammer in general tends to be noisy, and tile and grout in particular is very loud. And even if your removal is perfect, tile will chip and send little bits flying, like in parts of the room that might also contain an eye or two. In my case, I wound up with a bloody calf.
…
… (allowing those of you time to scroll past this spot if you don’t like the sight of blood or feet)
It was a small cut, and due to all of the debris falling, it didn’t register that I had been cut until after I was outside about thirty minutes later and felt my leg itching (then looked down and saw that I had been bleeding). It was small and easily dealt with, but still rather surprising! In hindsight, I probably should have worn pants instead of shorts (it’s Georgia summer, though — it’s shorts weather unless something has the potential to be really dangerous). Though now is a pretty good time to remind you guys to be up to date on all of your shots (like a tetanus booster… it’s easy to forget, but if you’re around rusty things and friends having babies like I am, use your friend’s kid’s birthday as a quick reminder of whether or not it’s been less than five years since you got a Tdap update, since you can get tetanus and whooping cough knocked out in one swoop).
Score, Then Hammer Old Drywall
I suppose a person could potentially reuse the old drywall, but with mine so wrecked from old tile adhesive, the easier approach seemed to be to replace the damaged areas. So, we tore into the old drywall with a hammer (so satisfying!) and then broke down the larger pieces for the trash.
To get a clean edge, I first scored the drywall with one of my favorite heavy duty utility knife and then made deeper cuts until it broke away.
Oh – and be mindful of pipes and other things. I reached a stubborn section and realized there was duct work behind the wall, so I’m really glad I wasn’t too aggressive with the hammer. As you weaken each section, the drywall will start to just fold off in pieces.
Take Out Nails/Screws
My house has nails holding up the drywall (this house was built in the early 80’s, so pretty much a house that had a lot of bare-minimum, “I’m going on a break in 5”-type of quality as it was built — if you remember the backyard sinkhole project, you’re already aware of the types of things these guys got away with!), so I had to pry them all out of the studs after the drywall panels came off. The only ones I left were around the bottom near the tub. These seemed to be where the original drywaller rested the old drywall to nail it in, creating a small gap above the tub and wall (this gap is later covered up by the first row of tile, but its function is to help prevent water from wicking up the drywall from the lip and corners of the tub). So, I planned to use the same nails to help me install the new board and give me something to prop it on.
Another thing I noticed that seemed kind of odd? The builders also used glue on the drywall when it came in contact with the studs, but not on most studs or on studs where it might make the most sense (such as near a pipe, where you might not want to chance the nail going in the wrong place). I haven’t really seen this before, so I even texted a couple of DIY buddies and they all thought it was weird, too. If someone has the answer on that, do tell!
Do Some Research
Here’s where I almost failed: I saw that the drywall I was taking out was the moisture-resistant kind, also commonly known as “greenboard” (called that because it’s covered in color-coded green paper to distinguish it from regular drywall). So, I assumed that to begin my new shower, all I needed to do was replace like for like and put it back in. I even did it and started taping the seams:
Except I also knew about waterproofing materials being a thing I’ve seen other people using in DIY projects, and after buying some of it and reading the instructions, I realized that greenboard is actually outdated (and even no longer up to code) for putting in a shower because it often still has moisture problems. I wound up calling a few friends for advice before ripping out the new greenboard and putting cement backerboard in instead. It was not a fun hiccup, considering that these materials are heavy and cumbersome when you want to hang them! But, at least I caught my own mistake before tiling over it or having to rip it out after waterproofing.
Alrighty… so I’ll leave this post as-is for now, but more posts are on their way! Any of your own tips to share? We’ve still got how-tos on replacing the drywall, waterproofing, tiling, and several videos I haven’t even had time to edit yet but I’ve committed to making, so I’m sure I’ll regret that decision later. And on Friday, I’ll cover a trip I took last month that serendipitously inspired my new tile choice. Stay tuned for all of that… definitely more to come.
The post Tips on How to Remove Old Shower Tile appeared first on The Ugly Duckling House.
Website // Subscribe // Advertise // Twitter // Facebook // Google+
Tips on How to Remove Old Shower Tile published first on http://ift.tt/1kI9W8s
0 notes
Text
Tips on How to Remove Old Shower Tile
As you might have already picked up on previous posts, my Instagram, or if you just have a pretty awesome streak of ESP this week, I’ve decided that my master bathroom is finally going to get my focus this summer. It’s not going to be just my floor that gets some tile help, though — I’m redoing the shower, too!
But before I get into the whole do-it-yourself project of how to tile a new shower (I’ve actually already had some trial and error in the last week I need to share with you, and I’m trying to shoot some video too!), there’s a part of this whole process that I really have a fondness for: DEMO… DEMO… DEMO
However!
Demo isn’t just jump right in, hammers a-swingin’ — if you want to remove an old tiled shower properly and efficiently, you are probably going to need this handy list of tips. Not because I don’t think you aren’t perfectly capable of figuring this out on your own (and a lot of it is common sense, really), but because the temptation to swing a hammer at ugly tile you can’t wait to remove is VERY hard to resist. So, you might be a little premature (like I was) and get all giddy from seeing the tile fall off the wall and ignore some important stuff. These tips will not only help you from damaging the things you don’t want to, but it will prepare yourself a little more than I did to avoid injury.
Affiliate links may be used in this post when linking to products I recommend. Thank you for supporting this site!
How to Demo A Tiled Shower — Effectively and Quickly!
Protect the Tub
In my case, I wanted to keep the tub. So, I laid down some old sheets and taped up the edges with painter’s tape to give the tiles something to land on. The tiles may not seem razor sharp, but if it breaks at a weird angle, it can still chip the tub below. Even if you don’t plan on keeping the tub and want to sell it or something, it’s still better to sell it damage-free. And don’t forget to plug the drain with something!
Start at the Edges
This seems obvious, but outside > in works best. If your shower is as old as mine, you might even have some looser tiles around the tub base and can start there first (and note to self: any areas you find water damage or areas of the tub where water tends to drip should be spots you’re sure to waterproof when you install new tile).
Hammer a Putty Knife at Grout Lines
One of the things I least expected was that using a putty knife blade (more specifically, one of those 6-in-1 painter’s tools) along grout lines and hammering on the end of the handle (sort of like a chisel) before trying to pry at each tile seemed very effective. I tried it mainly out of curiosity at first. My impression was that the tiles were still stuck on pretty well, but I assume the hammering at weak points created enough vibrations to fracture underlying spots of old thinset and grout. I only know that this was more effective than not because I started secretly (aka, unbeknownst to him, but for my own demolishing pride) competing with a very helpful bearded dude who was removing tile on the opposite side of the shower* — I wound up smoking his ass in demo. He swore it was only because I had the better putty knife, and while I can’t deny that I used a better quality tool, after a while he wanted me to whack at the grout lines on his side when mine started coming off in larger chunks.
*And yes, this is how we do date night sometimes, and I really like that we haven’t tried to stab each other with so many weapons tools at our disposal to do so (so far). There were plenty of “this is not how I pictured being in the shower together” jokes made that night.
Wear Protection
You know I’m laughing at myself for yet again having a suggestive tip for DIY, but honestly: if you are regularly doing DIY or woodworking projects and you don’t find yourself thinking “that’s what she said” at least once during each project, you might be doing something wrong. Or don’t have my sense of humor. Or aren’t in the U.S. and haven’t watched The Office (in the British version I’m pretty sure it was “said the actress to the bishop”).
But anyway, back to the important tip: wear ear protection, eye protection, and proper clothing. Hitting anything with a hammer in general tends to be noisy, and tile and grout in particular is very loud. And even if your removal is perfect, tile will chip and send little bits flying, like in parts of the room that might also contain an eye or two. In my case, I wound up with a bloody calf.
…
… (allowing those of you time to scroll past this spot if you don’t like the sight of blood or feet)
It was a small cut, and due to all of the debris falling, it didn’t register that I had been cut until after I was outside about thirty minutes later and felt my leg itching (then looked down and saw that I had been bleeding). It was small and easily dealt with, but still rather surprising! In hindsight, I probably should have worn pants instead of shorts (it’s Georgia summer, though — it’s shorts weather unless something has the potential to be really dangerous). Though now is a pretty good time to remind you guys to be up to date on all of your shots (like a tetanus booster… it’s easy to forget, but if you’re around rusty things and friends having babies like I am, use your friend’s kid’s birthday as a quick reminder of whether or not it’s been less than five years since you got a Tdap update, since you can get tetanus and whooping cough knocked out in one swoop).
Score, Then Hammer Old Drywall
I suppose a person could potentially reuse the old drywall, but with mine so wrecked from old tile adhesive, the easier approach seemed to be to replace the damaged areas. So, we tore into the old drywall with a hammer (so satisfying!) and then broke down the larger pieces for the trash.
To get a clean edge, I first scored the drywall with one of my favorite heavy duty utility knife and then made deeper cuts until it broke away.
Oh – and be mindful of pipes and other things. I reached a stubborn section and realized there was duct work behind the wall, so I’m really glad I wasn’t too aggressive with the hammer. As you weaken each section, the drywall will start to just fold off in pieces.
Take Out Nails/Screws
My house has nails holding up the drywall (this house was built in the early 80’s, so pretty much a house that had a lot of bare-minimum, “I’m going on a break in 5”-type of quality as it was built — if you remember the backyard sinkhole project, you’re already aware of the types of things these guys got away with!), so I had to pry them all out of the studs after the drywall panels came off. The only ones I left were around the bottom near the tub. These seemed to be where the original drywaller rested the old drywall to nail it in, creating a small gap above the tub and wall (this gap is later covered up by the first row of tile, but its function is to help prevent water from wicking up the drywall from the lip and corners of the tub). So, I planned to use the same nails to help me install the new board and give me something to prop it on.
Another thing I noticed that seemed kind of odd? The builders also used glue on the drywall when it came in contact with the studs, but not on most studs or on studs where it might make the most sense (such as near a pipe, where you might not want to chance the nail going in the wrong place). I haven’t really seen this before, so I even texted a couple of DIY buddies and they all thought it was weird, too. If someone has the answer on that, do tell!
Do Some Research
Here’s where I almost failed: I saw that the drywall I was taking out was the moisture-resistant kind, also commonly known as “greenboard” (called that because it’s covered in color-coded green paper to distinguish it from regular drywall). So, I assumed that to begin my new shower, all I needed to do was replace like for like and put it back in. I even did it and started taping the seams:
Except I also knew about waterproofing materials being a thing I’ve seen other people using in DIY projects, and after buying some of it and reading the instructions, I realized that greenboard is actually outdated (and even no longer up to code) for putting in a shower because it often still has moisture problems. I wound up calling a few friends for advice before ripping out the new greenboard and putting cement backerboard in instead. It was not a fun hiccup, considering that these materials are heavy and cumbersome when you want to hang them! But, at least I caught my own mistake before tiling over it or having to rip it out after waterproofing.
Alrighty… so I’ll leave this post as-is for now, but more posts are on their way! Any of your own tips to share? We’ve still got how-tos on replacing the drywall, waterproofing, tiling, and several videos I haven’t even had time to edit yet but I’ve committed to making, so I’m sure I’ll regret that decision later. And on Friday, I’ll cover a trip I took last month that serendipitously inspired my new tile choice. Stay tuned for all of that… definitely more to come.
The post Tips on How to Remove Old Shower Tile appeared first on The Ugly Duckling House.
Website // Subscribe // Advertise // Twitter // Facebook // Google+
0 notes